When you join Reply, you can add multiple email accounts from different providers to send and receive emails.
💡 Keep in mind, this step is recommended to be the first one as it is necessary to launch email campaigns. However, you can add it later and skip the setup to explore other Reply features first.
🎥 See the video below to learn how to connect an email account.
Once you are ready, follow these simple steps:
-
Go to the Email Accounts tab of your Settings.
-
Click New email account, then Create manually.
💡 The same menu has an Import to MailToaster box, ticked by default. If it is ticked and your account doesn't have MailToaster access yet, Reply takes you to MailToaster instead. Untick the box to go straight to connecting the mailbox.
-
Select your email provider and click Continue.
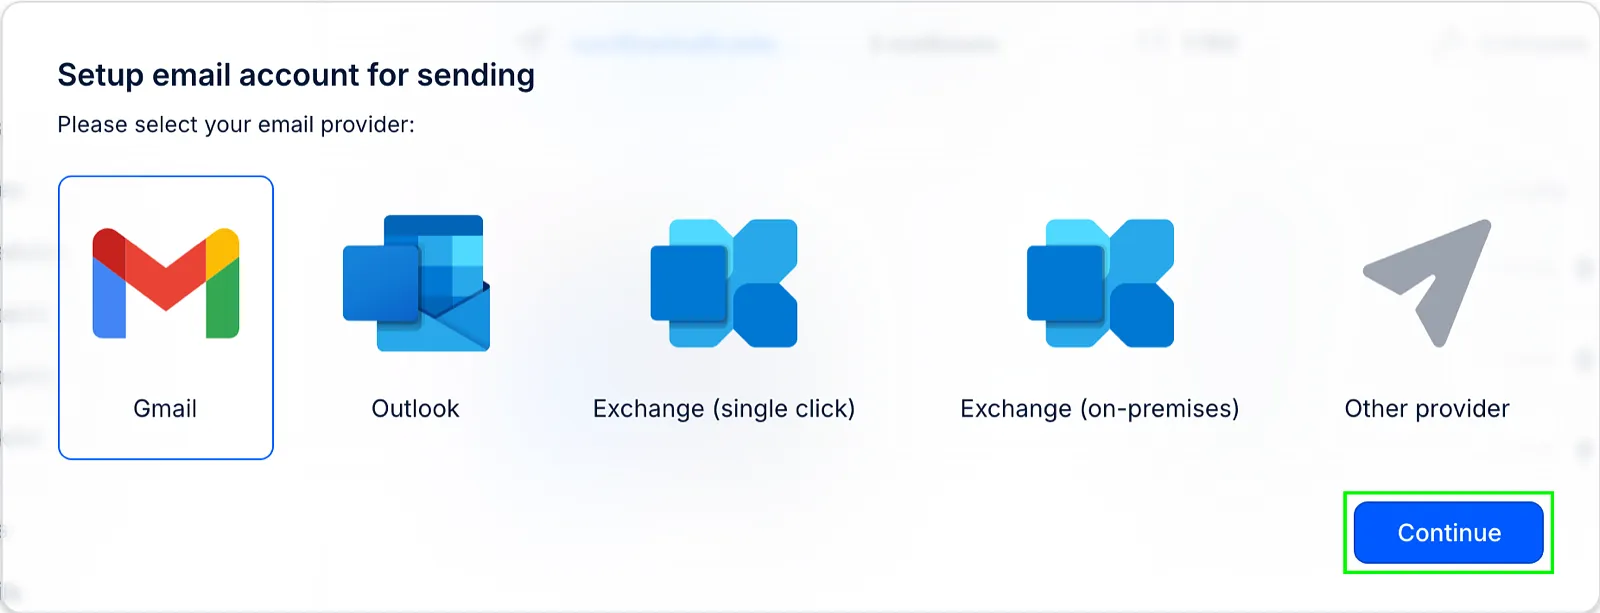
💡 Note: If you already use all the email accounts in your plan, Reply asks you to confirm the purchase before connecting: "You don't have enough email accounts for this. N additional account(s) will be purchased for $X." Click Buy to continue. If you click Cancel, the account is not added.
Connecting a Gmail account
For Google Workspace mailboxes, we offer a single-click connection type, so it will only take seconds:
-
Select Gmail in the pop-up window.
-
Choose the mailbox you want to connect.
-
Sign in and accept Reply's Privacy Policy and Terms of Service.
Please make sure you enable the 2-factor verification.
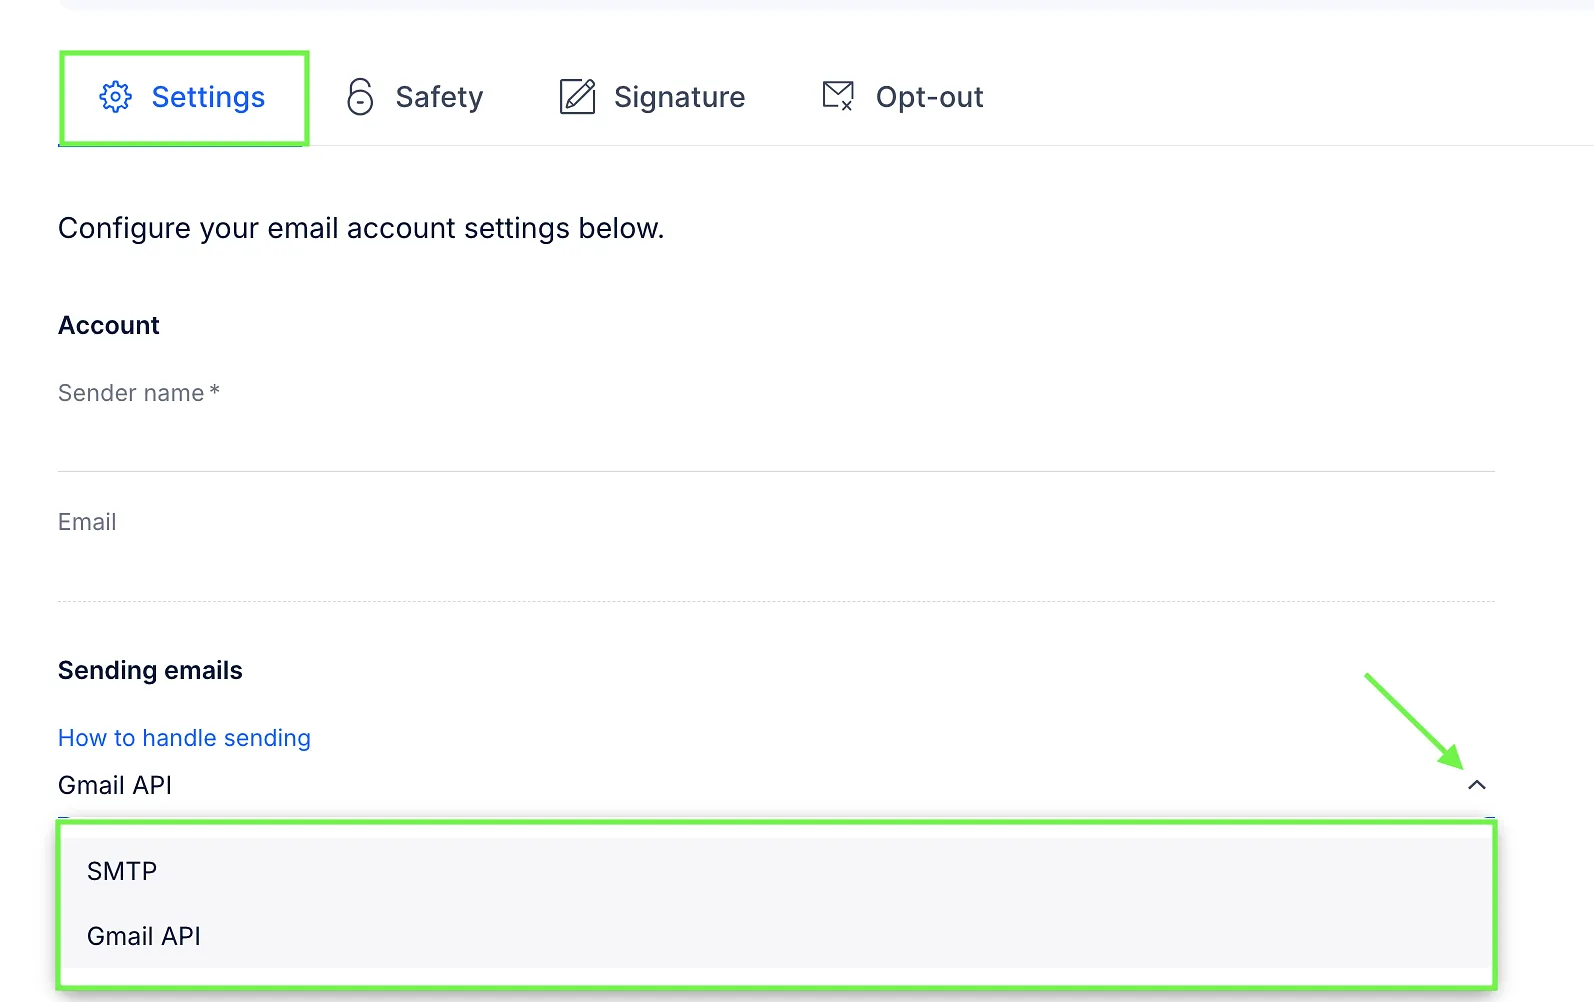
When you connect a Gmail account using Gmail Single Click, Reply sends emails through Gmail API instead of SMTP. This option is enabled by default for Gmail Single Click accounts. Using Gmail API can help improve email deliverability and reduce the chances of emails being filtered as spam.
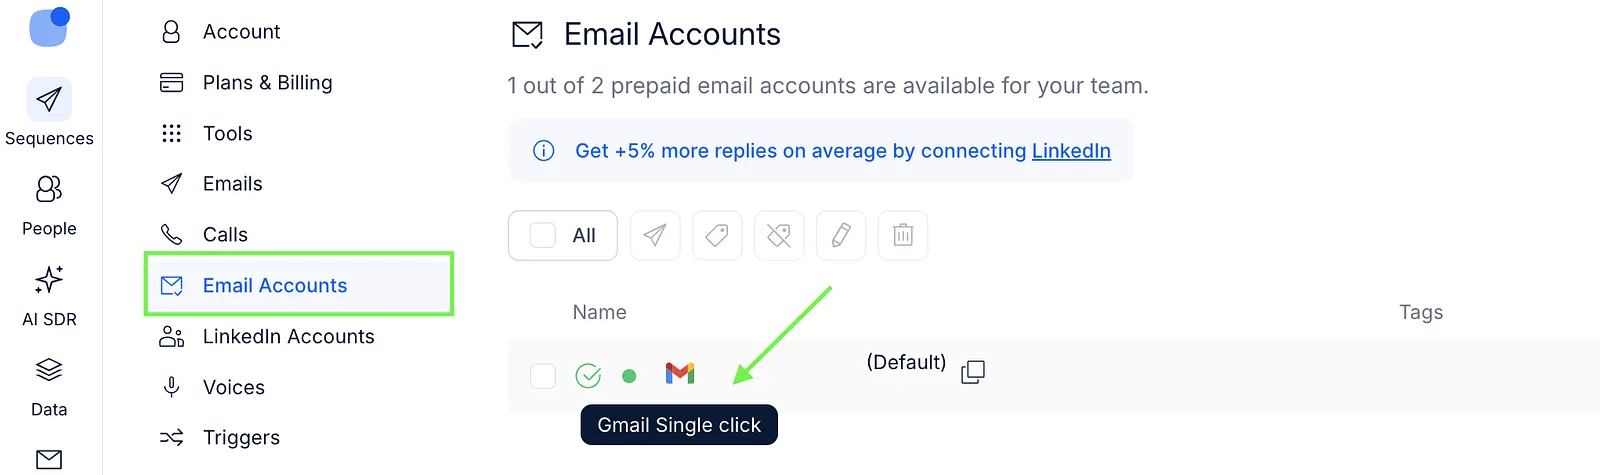
You can also switch between Gmail API and SMTP at any time for supported Gmail Single Click accounts. To do this:
-
Select the Gmail account connected via Gmail Single Click.
-
Go to Settings and select either Gmail API or SMTP as the sending method.
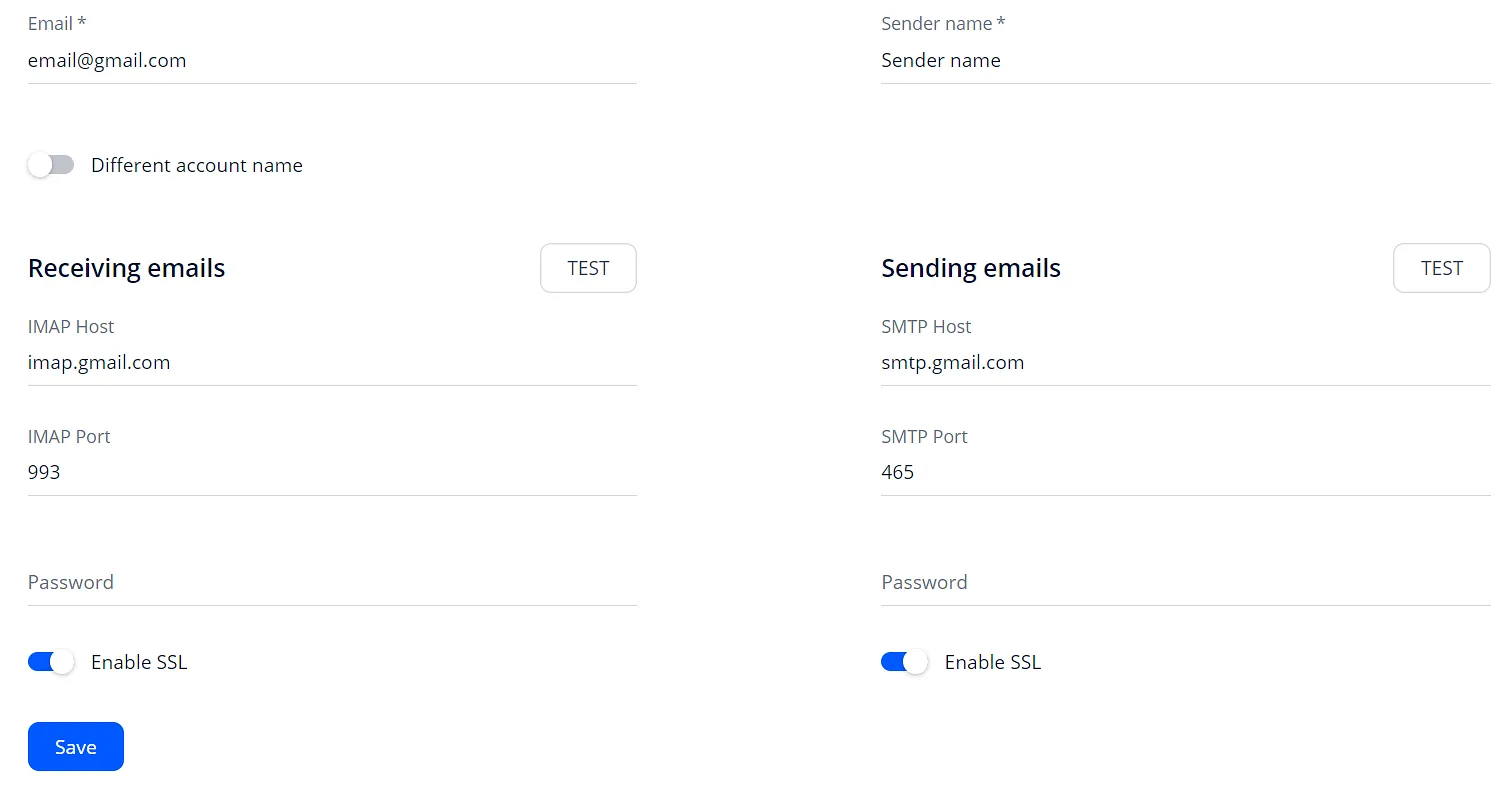
If you face issues with the single-click connection, choose the Other Provider option and enter the settings manually. SSL needs to be enabled for both sending and receiving:
-
Email - enter your email address
-
IMAP host - imap.gmail.com
-
IMAP port - 993
-
IMAP password - Your Gmail app-generated password
-
SMTP host - smtp.gmail.com
-
SMTP port - 465
-
SMTP password - Your Gmail app-generated password
Connecting an Outlook/Office 365 account via Single-Click
Connecting the Outlook account via single-click is similar to Gmail: you sign in with Microsoft, no password needed. Reply sends emails through Microsoft's API and reads replies over IMAP, so IMAP must be on for the mailbox. It's on by default in Microsoft 365. If IMAP is turned off for your mailbox, you have two options:
- ask your admin to turn IMAP on (see Microsoft's guide: Managing email apps for user mailboxes), or
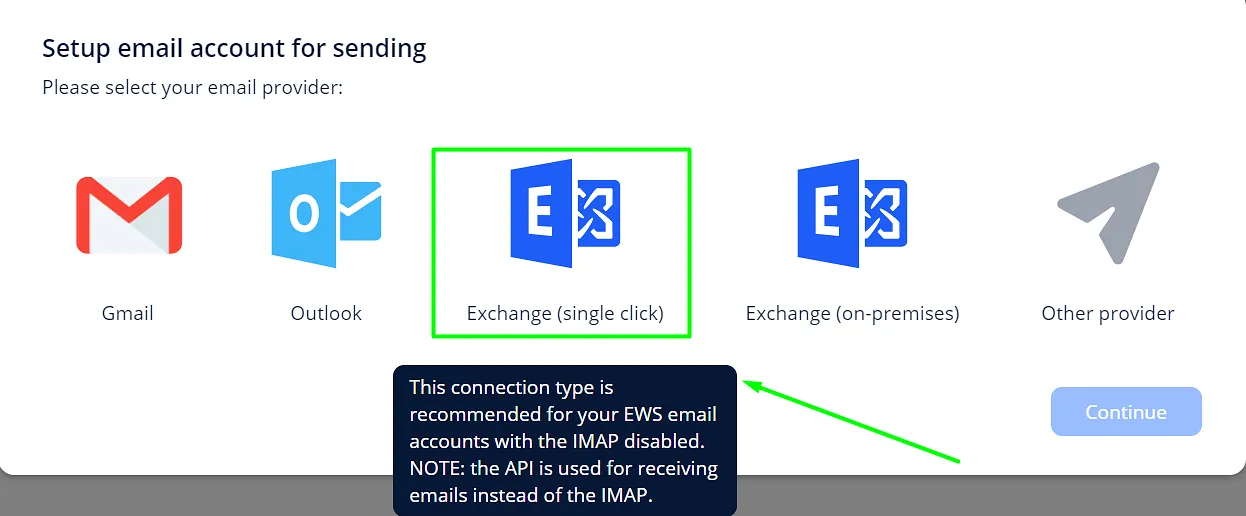
- connect the mailbox with Exchange single-click instead. It doesn't use IMAP. Keep in mind that Exchange single-click mailboxes can't be added to MailToaster warm-up.
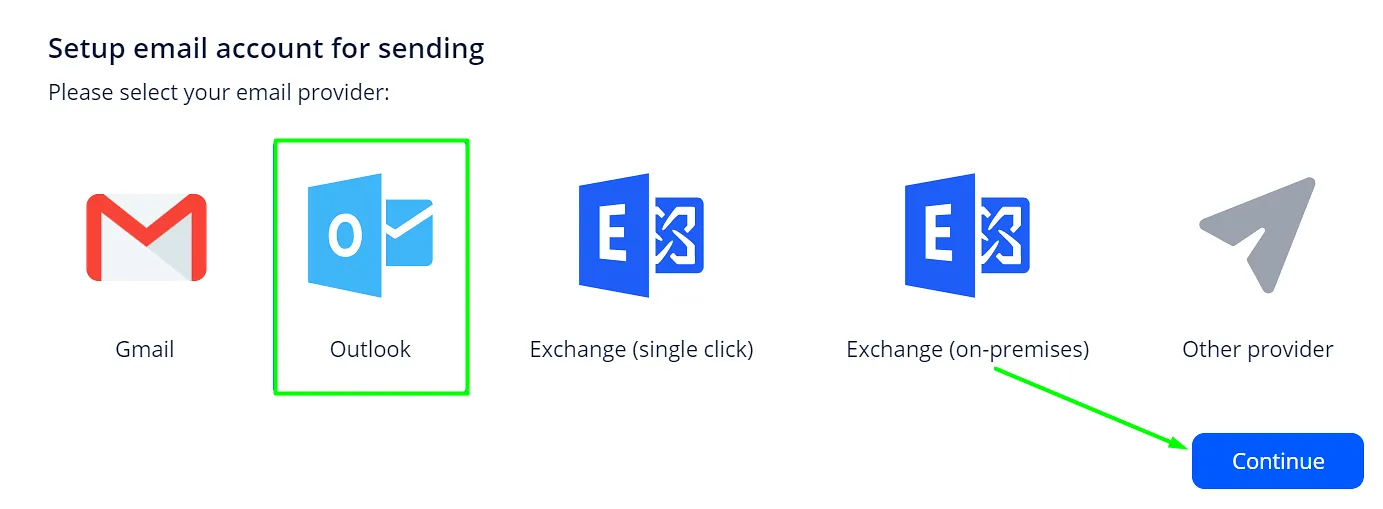
The Exchange single-click variant is recommended for your EWS on Microsoft servers email accounts. It uses API for receiving emails instead of the IMAP.
Connecting an Office 365 account with a different sending server
You can receive emails from your Office 365 mailbox through a single-click connection and send emails through a different SMTP server, for example SendGrid. Microsoft no longer allows password sign-in over SMTP, so the sending server can't be Outlook's own SMTP.
-
Choose the Other Provider option.
-
Enable the I want to use different email servers for sending and receiving emails toggle.
-
In the Sending emails section, enter the details of your sending server:
-
Email - enter your email address.
-
User Name - the user name for your sending server.
-
Sender name - add the name you want to be displayed as the sender.
-
SMTP Host, SMTP Port and Password - from your sending server's settings.
-
Enable SSL - turn it on if your sending server requires it.
-
-
Save the changes. This will unlock the Connect Office 365 button.
-
In the Receiving emails section, click Connect Office 365. You'll be redirected to your Microsoft account to sign in.
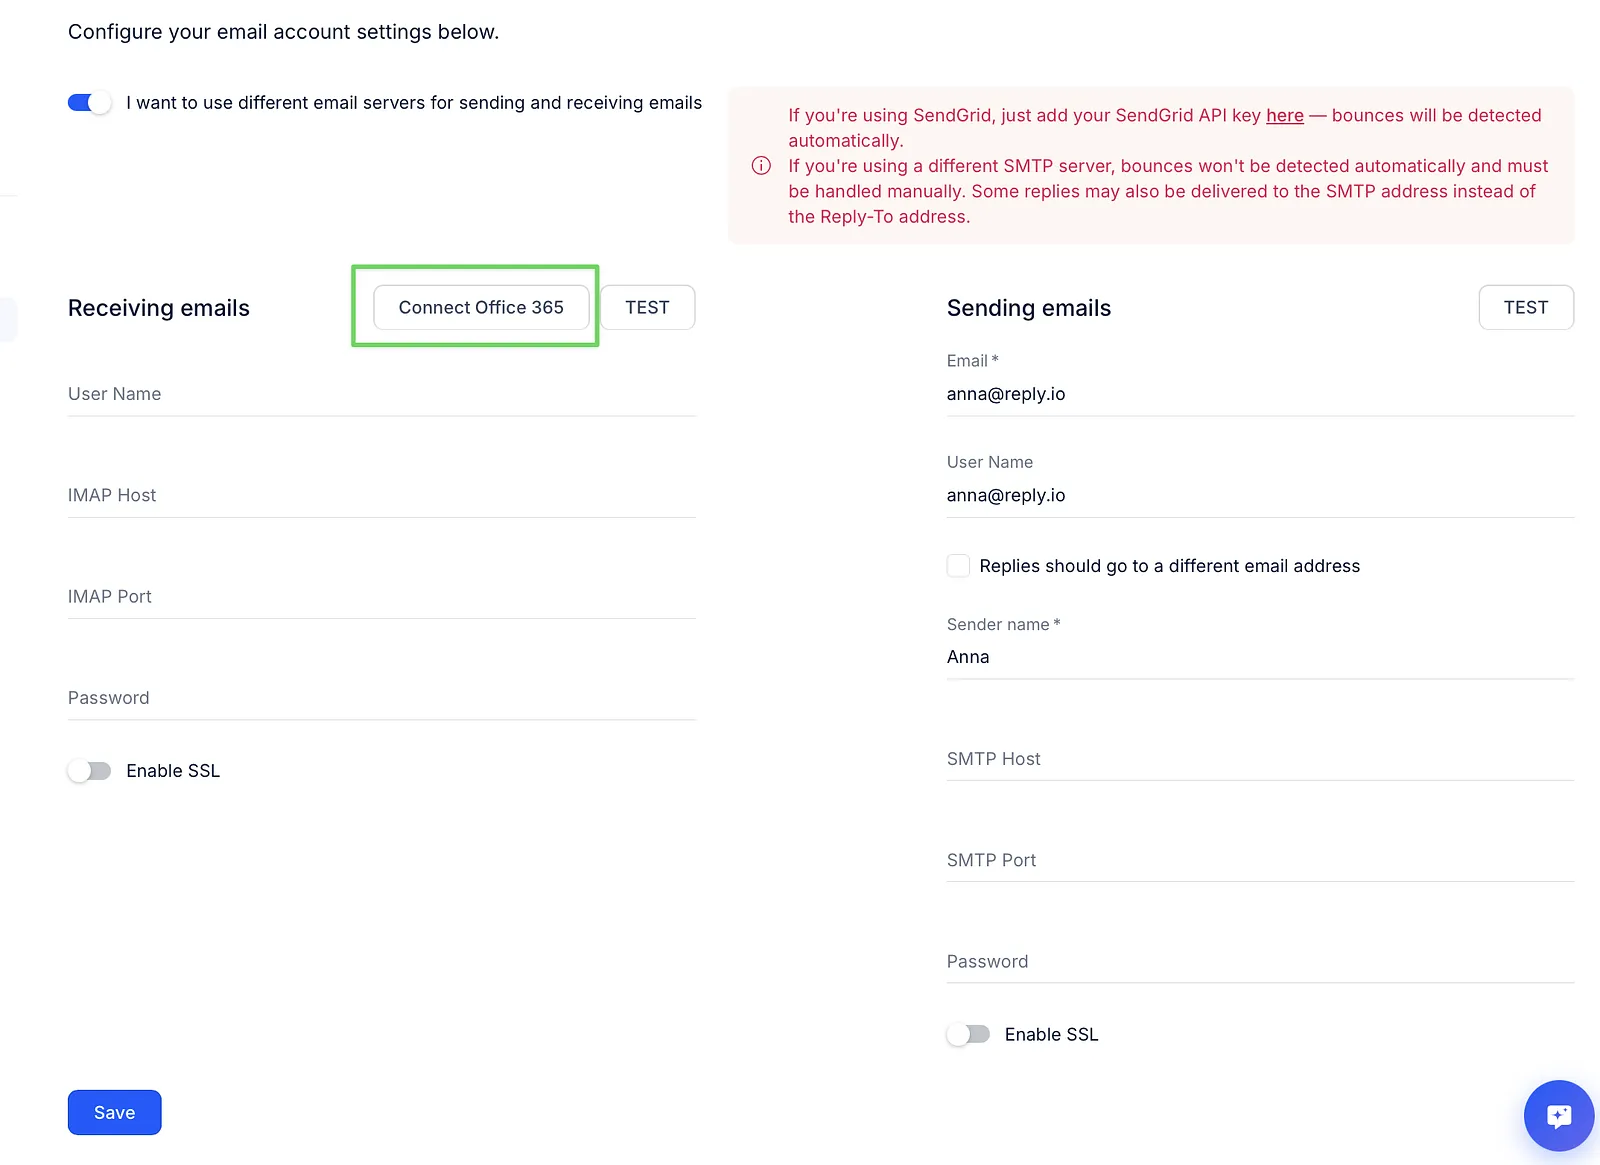
Once signed in, the system will automatically populate the settings for receiving.
💡 If you send through SendGrid, add your SendGrid API key so bounces are detected automatically. With any other SMTP server, bounces aren't detected automatically and must be handled manually, and some replies may go to the SMTP address instead of the Reply-To address.
Connecting a Microsoft Exchange account
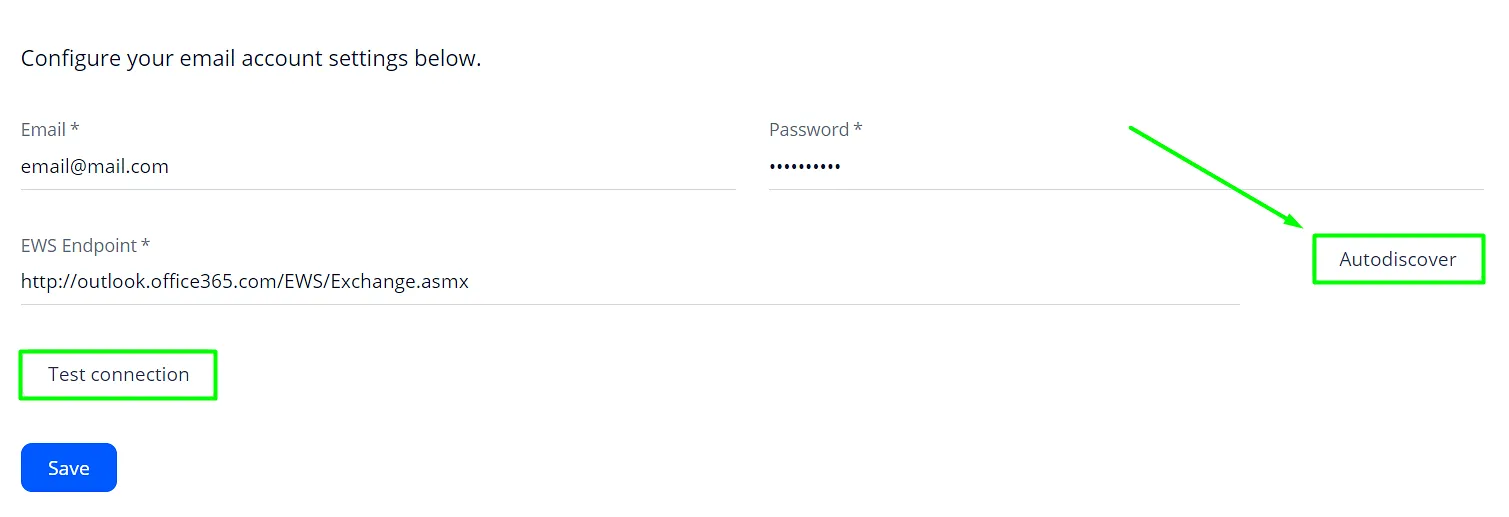
This type is recommended for your EWS on private servers and the setup is slightly different:
-
Choose the Exchange (on-premises) option and click Continue.
-
Paste your email address into the Email field.
-
Use your mailbox password in the Password field.
-
Next to the EWS Endpoint field, click on the Autodiscover button.
-
Test the connection and Save the changes.
Connecting Other Provider mailboxes
The Other provider option needs manual setup, so here is what you need to keep in mind👇
-
The provider should support IMAP, SMTP protocols, and third-party app connections.
-
The Host Names and Port Numbers are listed on the provider's side.
-
IMAP is enabled.
When you are ready with the settings, click Test next to Sending/Receiving and ensure the dot is green. A red sign indicates an issue; hover over it for troubleshooting tips

Read more about email accounts here: