Calls are placed from your rented Reply number. The Custom Caller ID feature can mask the rented number and show yours instead. This article will help you with the steps.
To enable Custom Caller ID, you first need to turn Cloud Calls on. Here's what you need to do👇
- Go to the Calls tab of your Settings;
- Request calls:
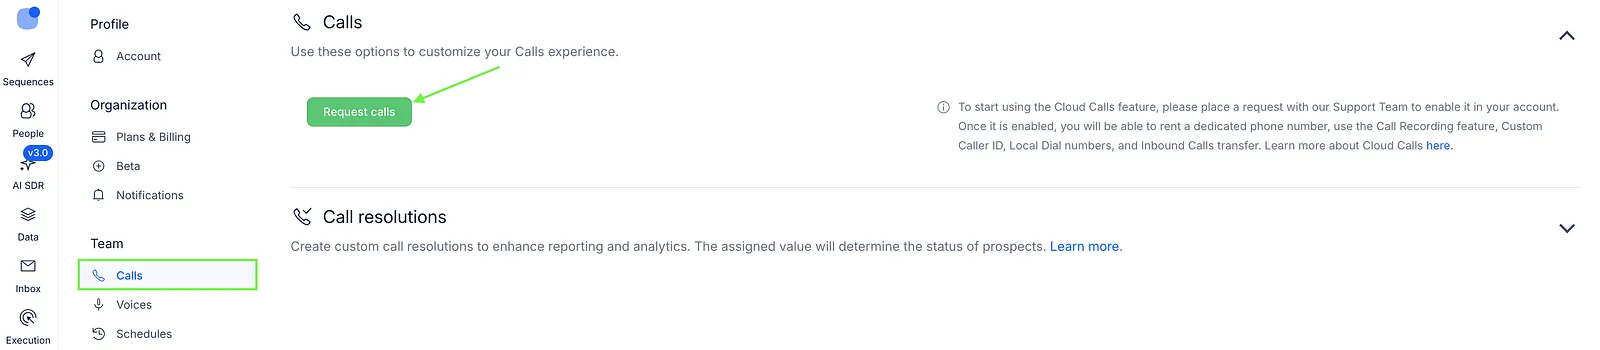
- Enable Cloud Calls with our Support team at [email protected].
💡 If the Calls tab already shows the Enable team calls toggle instead of the Request calls button, Cloud Calls is available for your team: turn the toggle on instead of steps 2 and 3.
Once Cloud Calls is on, set up Custom Caller ID:
- Return to the Settings;
- Go to the Calls tab;
- Enable Custom Caller ID toggle:
- Fill in the number field and click Add phone.
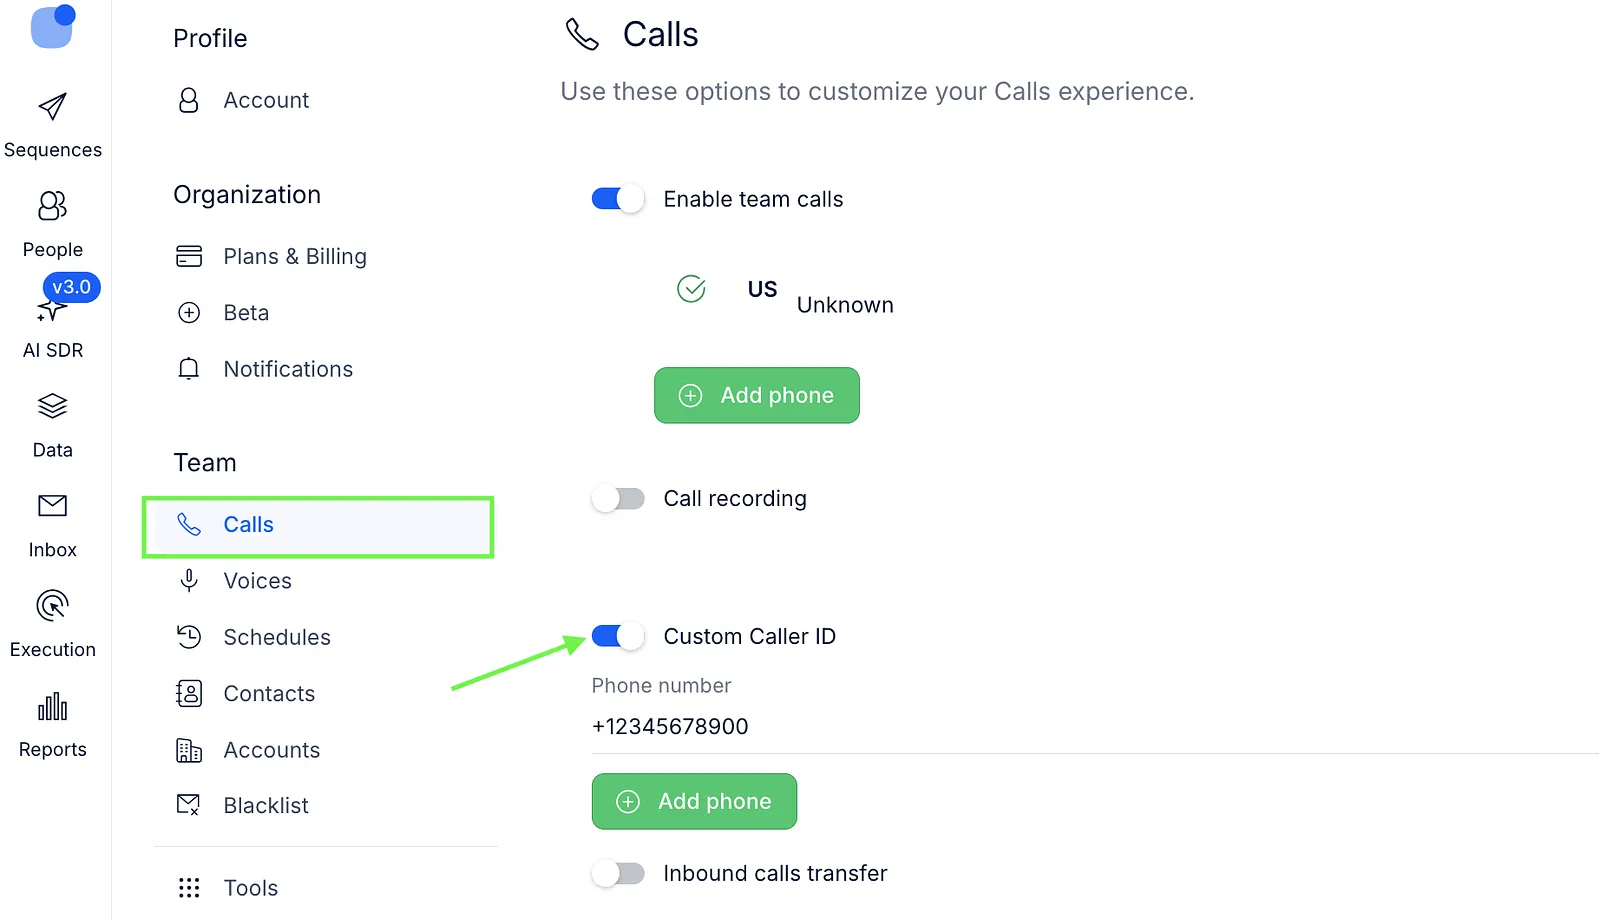
Reply shows a verification code on the screen, and you get a call to that number shortly after. Enter the code when the call asks for it to confirm the number.
Once verification is complete, your custom number will be displayed to recipients instead of your rented Reply number when you make calls.
💡Custom Caller ID is only available for US and Canadian phone numbers.
If you have any questions, feel free to message our Support team in chat or email them at [email protected].